You can connect using various components depending on which way you want to hookup. If you have a stereo amplifier or stereo receiver or an audio/video receiver with a PHONO input, then you do not need a Phono-Preamp. If you have none of these components, then you will need a Phono-Preamp. You also need some cables to connect up components and you also need some software to record on the computer. There are also today some other options such as a USB turntable which connects to the computer with a USB hookup. These devices are available for around $150. One newer turntable has a built-in iPod port so you can go from vinyl to iPod.
To connect a component type (unamplified) turntable, WITHOUT A RECEIVER, to your PC sound card, you will need a separate phono preamp . There are two reasons for this:
1. Low output - Turntable Phono cartridges put out a much weaker signal - 6 millivolts or so - than the other standard components of a stereo system do, which typically put out 300 to 500 milli-volts or more.
A sound card line-in is simply not matched for the low output of phono cartridges. That is why you have special phono only inputs on your receiver. 2. Equalization - this is the process of weakening (compressing) the low frequencies and strengthing (stretching) the higher frequencies. This is how vinyl records are recorded and what makes it possible to squeeze the wide range of sound within the narrow grooves of a record. If that signal were to be played back directly, you would have a totally unnatural sound - screechy highs and no bass. To be played back correctly, the sound has to be restored to it's normal state during playback - the reverse of equalization has to occur - and that is the purpose of a phono pre-amp which fixes the problem by boosting the weak signal and "flattening" the frequency response. The audio input connection on your computer: The audio input connection on a desktop computer is typically a 1/8" mini-jack on the back panel, labeled Line-In, usually marked with a light blue color, close to where the speakers are connected to a similar type of jack (usually marked with a green color). The Line-In connection is sometimes marked with the symbol Line-In symbol where the arrow points inwards, which is not to be confused with the speaker output marked with the symbol Speaker symbol where the arrow points outwards.
A sound card line-in is simply not matched for the low output of phono cartridges. That is why you have special phono only inputs on your receiver. 2. Equalization - this is the process of weakening (compressing) the low frequencies and strengthing (stretching) the higher frequencies. This is how vinyl records are recorded and what makes it possible to squeeze the wide range of sound within the narrow grooves of a record. If that signal were to be played back directly, you would have a totally unnatural sound - screechy highs and no bass. To be played back correctly, the sound has to be restored to it's normal state during playback - the reverse of equalization has to occur - and that is the purpose of a phono pre-amp which fixes the problem by boosting the weak signal and "flattening" the frequency response. The audio input connection on your computer: The audio input connection on a desktop computer is typically a 1/8" mini-jack on the back panel, labeled Line-In, usually marked with a light blue color, close to where the speakers are connected to a similar type of jack (usually marked with a green color). The Line-In connection is sometimes marked with the symbol Line-In symbol where the arrow points inwards, which is not to be confused with the speaker output marked with the symbol Speaker symbol where the arrow points outwards.

To record from the connected audio equipment, you typically select the sound source named Line-In in the Sound Recorder:
Sound source selection
* Laptop or notebook computers
Laptop
Most laptop or notebook computers only have one 1/8" mini-jack input connection, marked Mic or Microphone, usually marked with a red/pink color, close to where a headphone can be connected to a similar type of jack (usually marked with a green color).
To record from the connected audio equipment, you typically select the sound source named Mic or Microphone in the Sound Recorder:
Sound source selection
If your laptop or notebook (or its docking station) has a blue colored Line-In connection as well, then it is preferable to connect the audio equipment to that connection.
In that case you typically select the sound source named Line-In in the Sound Recorder software. The plug that goes into the input connection of the computer, has to be a stereo 1/8" mini-plug, similar to the one for the computer speakers: Stereo plug Note that the stereo mini-plug has two black plastic rings at the tip and this is not to be confused with a mono plug that has only one black plastic ring at the tip: Mono plug Using a mono plug to connect the audio equipment to the computer, typically results in sound coming in on the left channel only. The audio output connection on the audio equipment What the audio output connection type on the audio equipment is, depends on the kind and model. It is usually marked Play-Out, Line-Out, Audio-Out or something in similar wording

*
RCA connectors This type of connector is most times found on modern audio equipment, like on this JVC cassette deck: * Mini-jack connectors This type of connector is most times found on portable players. Connecting a traditional turntable (vinyl record player) To record from vinyl records, you will need a (pre-)amplifier connected in between the turntable and the computer. The signal strength of the turntable output is too weak to be connected to the computer directly and besides that, the pre-amplifier applies so called RIAA correction on the signal. If your home audio set does not have a pre-amplifier built-in, or if it has no Rec-Out, Line-Out or Audio-Out output, then you can buy a separate turntable pre-amplifier. Your home audio set will have a pre-amp built-in, if it has a Phono input connection to connect the turntable to and a Rec-Out output connection to connect to the computer.
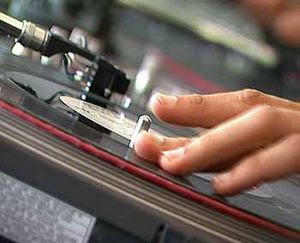
Turntable The Rec-Out connection on the amplifier must be connected to the computer. This is the same connection that is usually connected to a cassette or tape recorder to record on tape the traditional way. It is especially important to select the right type of cartridge (pick-up element) that is installed on the turntable, with the phono selector switch on the amplifier. Consult the manual of the turntable for the right type, for example MM (Moving Magnet) or MC (Moving Coil). Selecting the wrong one will influence the sound quality and the Click and Crackle filters in the Sound Editor may not be able to filter clicks or scratches in recordings. Do not forget to also connect the ground-wire from the turntable to the amplifier. This eliminates hum, picked up by the sensitive pick-up element on the turntable. What if I only have headphones or speaker outputs? Some audio sets like boom boxes don't have audio output connectors other than for headphones or speakers. The signal strength of these outputs is most times higher than desired for the input on your computer and their signal strengths depend on the volume control setting for that output. Special care is therefore required to connect such outputs to your computer. Before you connect the headphones or speaker output to the computer, make sure to set the volume control on the audio equipment at zero first! * Headphones output connection If your audio set has a headphones output connector, then it is preferred to use that one as opposed to the speaker connections.
You will have to experiment with the volume control level for the headphones connection, to see which level results in the best recording quality. The headphones volume control on the player, in combination with the recording volume control in the Sound Recorder, determine the end-result. As a rule of thumb the recording level peak meters in the Sound Recorder should hover in the yellow zone near the top, during the loudest fragments. To achieve this, set the volume control in the Sound Recorder window at approximately 75% of the full scale. Then playback something loud and slowly increase the volume control of the headphones output, until the recording level peak meters reach the yellow zone. Setting the headphones output volume too high will result in distorted sound, no matter how low you set the volume control in the Sound Recorder window. RCA Stereo To 3.5mm Stereo Mini-Jack Adapter.

If you're planning to record your LPs onto Recordable CDs on your computer, this is the adapter you need. Many other adapters are for a 1/8 in. mini-jack, which is .013 inches too small. A 1/8 in. jack will fit, but the electrical contact will not be solid, and it will jiggle and likely fall out. This is a true 3.5 mm mini-jack, the correct size for your computer sound card. To record an LP onto a computer will require a phono-stage circuit with RIAA equalization. Going directly from the cartridge to the soundcard will not produce a correct signal.
In that case you typically select the sound source named Line-In in the Sound Recorder software. The plug that goes into the input connection of the computer, has to be a stereo 1/8" mini-plug, similar to the one for the computer speakers: Stereo plug Note that the stereo mini-plug has two black plastic rings at the tip and this is not to be confused with a mono plug that has only one black plastic ring at the tip: Mono plug Using a mono plug to connect the audio equipment to the computer, typically results in sound coming in on the left channel only. The audio output connection on the audio equipment What the audio output connection type on the audio equipment is, depends on the kind and model. It is usually marked Play-Out, Line-Out, Audio-Out or something in similar wording
*
RCA connectors This type of connector is most times found on modern audio equipment, like on this JVC cassette deck: * Mini-jack connectors This type of connector is most times found on portable players. Connecting a traditional turntable (vinyl record player) To record from vinyl records, you will need a (pre-)amplifier connected in between the turntable and the computer. The signal strength of the turntable output is too weak to be connected to the computer directly and besides that, the pre-amplifier applies so called RIAA correction on the signal. If your home audio set does not have a pre-amplifier built-in, or if it has no Rec-Out, Line-Out or Audio-Out output, then you can buy a separate turntable pre-amplifier. Your home audio set will have a pre-amp built-in, if it has a Phono input connection to connect the turntable to and a Rec-Out output connection to connect to the computer.
Turntable The Rec-Out connection on the amplifier must be connected to the computer. This is the same connection that is usually connected to a cassette or tape recorder to record on tape the traditional way. It is especially important to select the right type of cartridge (pick-up element) that is installed on the turntable, with the phono selector switch on the amplifier. Consult the manual of the turntable for the right type, for example MM (Moving Magnet) or MC (Moving Coil). Selecting the wrong one will influence the sound quality and the Click and Crackle filters in the Sound Editor may not be able to filter clicks or scratches in recordings. Do not forget to also connect the ground-wire from the turntable to the amplifier. This eliminates hum, picked up by the sensitive pick-up element on the turntable. What if I only have headphones or speaker outputs? Some audio sets like boom boxes don't have audio output connectors other than for headphones or speakers. The signal strength of these outputs is most times higher than desired for the input on your computer and their signal strengths depend on the volume control setting for that output. Special care is therefore required to connect such outputs to your computer. Before you connect the headphones or speaker output to the computer, make sure to set the volume control on the audio equipment at zero first! * Headphones output connection If your audio set has a headphones output connector, then it is preferred to use that one as opposed to the speaker connections.
You will have to experiment with the volume control level for the headphones connection, to see which level results in the best recording quality. The headphones volume control on the player, in combination with the recording volume control in the Sound Recorder, determine the end-result. As a rule of thumb the recording level peak meters in the Sound Recorder should hover in the yellow zone near the top, during the loudest fragments. To achieve this, set the volume control in the Sound Recorder window at approximately 75% of the full scale. Then playback something loud and slowly increase the volume control of the headphones output, until the recording level peak meters reach the yellow zone. Setting the headphones output volume too high will result in distorted sound, no matter how low you set the volume control in the Sound Recorder window. RCA Stereo To 3.5mm Stereo Mini-Jack Adapter.
If you're planning to record your LPs onto Recordable CDs on your computer, this is the adapter you need. Many other adapters are for a 1/8 in. mini-jack, which is .013 inches too small. A 1/8 in. jack will fit, but the electrical contact will not be solid, and it will jiggle and likely fall out. This is a true 3.5 mm mini-jack, the correct size for your computer sound card. To record an LP onto a computer will require a phono-stage circuit with RIAA equalization. Going directly from the cartridge to the soundcard will not produce a correct signal.